Help center / Venue: maps & seating
Build the venue map and give directions
Draw your venue once in Venue Studio, place halls and rooms on it, print signs, and publish a map that gives directions even offline.
The venue map answers the question people ask most at any event: where is that? It shows the whole building, level by level, with your halls, stands, session rooms and seating plans placed on it at their real size. Attendees get directions from where they are to any stand, room or seat — on the web at /venue and in the evenclo app, where routing works on the phone even when the hall Wi-Fi is down.
The map is drawn once for the venue and reused by every event you run there. Each event then adds its own booths, seats, signs and closures on top.
The order of work
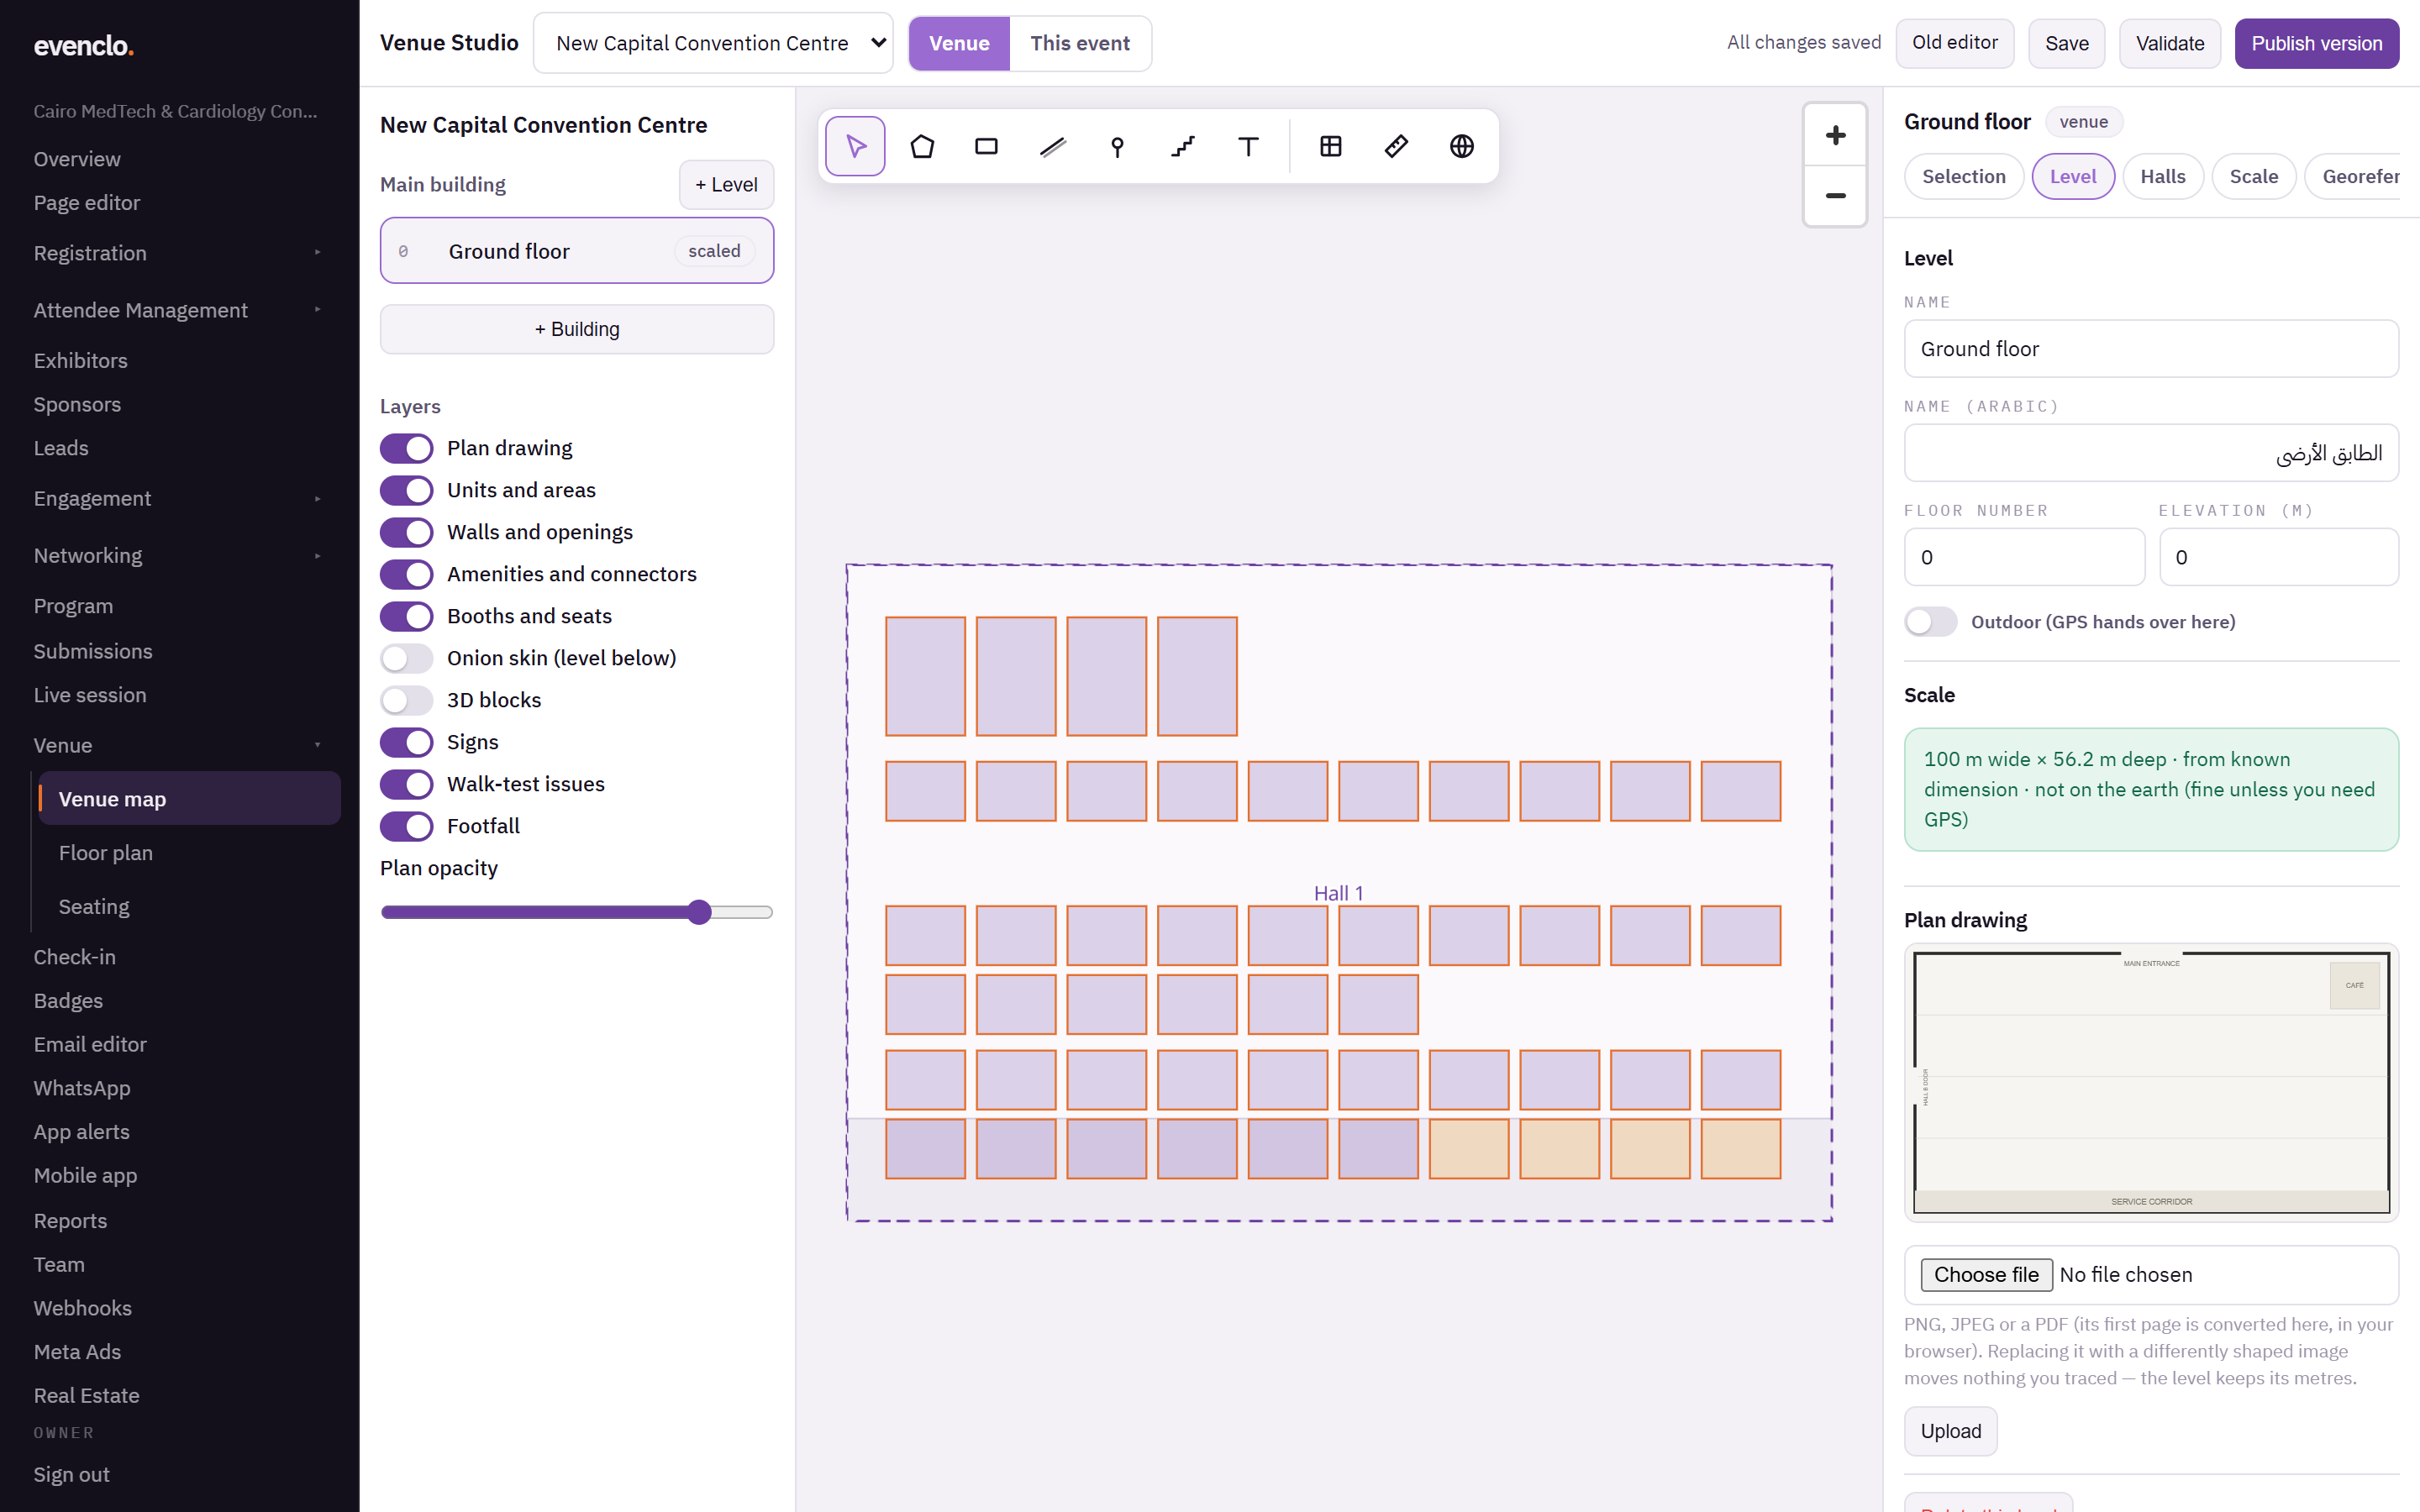
Open Venue → Venue map. The top bar has two modes: Venue for the building itself, and This event for what this event adds.
1. The building and its levels
- Pick the venue at the top, or create a new one.
- Press + Building, then + Level for each floor. Give each level a name in English and Arabic and its floor number.
- On the Level tab, upload the level's plan drawing: PNG, JPEG or a PDF. For a PDF, the first page is converted in your browser.
2. Scale
On the Scale tab, click two points on the plan whose distance you know — a wall, a doorway — and type the distance in metres. Everything you draw is then at true size, which is what makes walking times right.
3. Halls and rooms
On the Halls tab, place your exhibition halls and seating rooms on the level. They keep their own plans: booths stay edited on the floor plan and seats on the seating plan, and appear on the venue map in the right place.
4. Optional: put it on the earth
Georeference matches the plan to a satellite view by tapping the same points on both. You only need it if attendees will arrive from outside, where the phone's GPS takes over. The map routes fine without it.
5. Optional: import a CAD drawing
Import reads an architect's DXF, DWG or vector PDF and turns its layers into walls, rooms and booth outlines you can accept or discard.
6. Check and publish
Press Validate. Checks lists anything that cannot be reached from an entrance — a stand behind a wall, a room with no door. Fix those, then press Publish version.
This event
Switch to This event:
- Under Venue and version, pick the published version and press Pin to this event. Publishing the venue again later does not change a running event until you pin the new version.
- On Event features, draw any closures, temporary walls or lounges that exist for this event only.
- Press Publish event package. If booths, seats or signs change later, the page marks the package as stale until you publish again.
- Tick Show the venue map to attendees. Booths and seats inside it still follow the floor plan's and seating plan's own publish switches.
Signs: "you are here"
Signs are QR codes you print and tape up around the venue. Scanning one opens the map with "You are here" already set and asks "Where to?". On the Signs tab, press + Place a sign and click where it will hang. Select the signs you want and press Print sheet for A4 or A3 sheets with English and Arabic labels.
Route tester shows the real route, distance and walking time between any two places — the same routing the phones use.
On the day, staff can mark each sign as posted by scanning it in the staff app, and walk any route and flag a problem. Flagged routes appear on the Issues tab, pinned where the problem is.
Tape a sign at every entrance and at the registration desk. Most people open the map right after they arrive.
Privacy
Location sharing between attendees, footfall analytics and proximity features are off by default, and each also needs the attendee's own consent in the app. Footfall is only ever shown for groups of ten people or more, never for one person.
Common problems
A destination says it cannot be reached. Run Validate and look at Checks. Usually a wall or a closure blocks every door into that area.
Attendees still see the old layout. The event package is stale. Press Publish event package on This event.
Walking times look wrong. The level is not scaled. Set a known distance on the Scale tab.